
I've Automated My Homelab with the BAT Stack (Bootc, Ansible, Terraform/OpenTofu)
I rebuilt Geronimo Lab using Bootc, Ansible, Terraform/OpenTofu. This stack allows me to manage my homelab entirely through infrastructure as code tools, making it easier to maintain, scale and automate.
After playing around with my homelab creating services and self hosting anything I can think of, I came to the realization that manually managing these services was taking a lot of time. Services only got updated whenever they notified me and I got to it. While my documentation stayed up to date as I made major changes, I found myself forgetting to note down any ad hoc change I made to the system. This led to a drift between my documentation and the actual state of my servers. I had no trust that I would be able to rebuild my homelab if I had to.
The BAT stack is a combination of Bootc, Ansible and Terraform/OpenTofu. This stack allows me to manage my homelab entirely with infrastructure as code tools, making it easier to maintain, scale, automate, and recover.
What is BootC?
Bootc helps you to make containerized operating system images the same way you would make a container image with Docker or Podman. Instead of having to maintain different systems with different configurations, I can maintain one base image that all my systems are based on.
FROM quay.io/fedora/fedora-bootc:44
RUN dnf install -y dnf5-plugins && \
    dnf config-manager addrepo --from-repofile=https://pkgs.tailscale.com/stable/fedora/tailscale.repo && \
    dnf install -y \
        bash-completion \
        chrony \
        cloud-init \
        firewalld \
        git \
        jq \
        qemu-guest-agent \
        tailscale \
        vim \
        vim-enhanced \
        yq && \
    dnf clean all
# CIS hardening
RUN dnf install -y openscap-scanner scap-security-guide && \
    oscap xccdf eval --remediate \
        --profile xccdf_org.ssgproject.content_profile_standard \
        /usr/share/xml/scap/ssg/content/ssg-fedora-ds.xml ; \
    dnf remove -y openscap-scanner scap-security-guide && \
    dnf clean all
# Crypto policy
RUN update-crypto-policies --set DEFAULT
# SELinux kernel args
RUN mkdir -p /usr/lib/bootc/kargs.d
COPY kargs.d/01-selinux.toml /usr/lib/bootc/kargs.d/01-selinux.toml
# SELinux lockdown service
COPY selinux/selinux-lockdown.service /usr/lib/systemd/system/selinux-lockdown.service
# Enable services
RUN systemctl enable \
    chronyd.service \
    firewalld.service \
    qemu-guest-agent.service \
    selinux-lockdown.service \
    tailscaled.service

RUN bootc container lint
In my homelab, this made maintaining the system easier as there was now only one source of truth that every system in my lab was running. I learned about hardening systems using openscap and SELinux then incorporated that into the base image so that all my systems were hardened by default. The base image also includes qemu-guest-agent and cloud-init so that I can manage the systems through proxmox. The very last service I added was tailscale so that I could connect to my homelab remotely.
The benefit with bootc is that when I make an update to the container file and push it to the registry, all my VMs are able to update to the new image with built in rollback support if needed. Bootc gives me the same image based operating system but does not configure the applications running on top of it. This is where Ansible comes in.
What is Ansible?
Ansible helps you configure your servers using code. In my setup I have playbooks that configure the entire server stack by setting up caddy and using dynamic inventories with proxmox. This allows all my playbooks to be updated with what's currently running on the server.
When I set up a new VM and run the playbook, caddy automatically creates a domain name so that I don't have to use the IP address directly. Incorporated with Ansible Automation Platform I am able to have the playbooks on a schedule, have credentials stored securely in one central location, and be injected into the playbooks when needed.
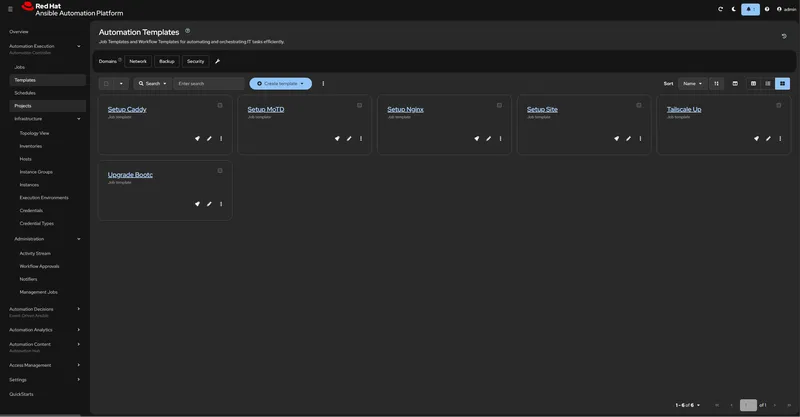
Ansible Automation Platform dashboard showing the playbooks I have setup
I fell down the rabbit hole of Ansible and found that I could use it as well to setup the entire network for my homelab. Using my ubiquiti unifi controller, I was able to use Ansible to configure my VLANs and firewall rules to segment my homelab, iot devices, and guest devices from each other. This was huge as it allowed me to have my network configuration version controlled.
The beauty of Ansible are the collections that are available to make it easy to integrate with other systems. Once I had a repeatable operating system and a way to configure it, I needed a way to provision the VMs. This is where Terraform/OpenTofu comes in.
What is Terraform/OpenTofu?
Terraform/OpenTofu helps you create and manage your infrastructure using code. I chose OpenTofu in my lab as it is a community driven fork of Terraform and is open source. It maintains compatibility with Terraform modules and providers. For proxmox, I used the bpg provider because it was being actively maintained and recently updated.
To avoid duplicating configuration, I created a reusable VM module. Each virtual machine only specifies the values that differ, such as its name, CPU, memory, disk size, and IP address, while the module handles the shared configuration. By using this module, I can easily create new VMs that already have the configuration I want and are ready to be managed by Ansible.
resource "proxmox_virtual_environment_vm" "this" {
name      = var.vm_name
vm_id     = var.vm_id
node_name = var.venv_node_name

description = "Managed by Terraform"
machine     = "q35"
bios        = "ovmf"
started     = true
tags        = var.tags


stop_on_destroy = true

agent {
enabled = true
}

cpu {
cores = var.cores
type  = "x86-64-v3"
}

memory {
dedicated = var.memory
}

efi_disk {
datastore_id = var.datastore_id
type         = "4m"
}

disk {
datastore_id = var.datastore_id
file_id      = var.image_id
interface    = "virtio0"
iothread     = true
discard      = "on"
size         = var.disk_size
}

initialization {
ip_config {
ipv4 {
address = "192.168.50.${var.ip_octet}/24"
gateway = "192.168.50.1"
}
}
dns {
servers = ["192.168.50.213"]
}
user_account {
username = "ansible"
keys     = [file("~/.ssh/id_ed25519_ansible.pub")]
}
}
network_device {
bridge  = "vmbr0"
vlan_id = var.vlan_id
}
}
locals {
  image_id = "local:import/geronimo-base.qcow2"
}

module "caddy" {
  source         = "./modules/vm/"
  vm_name        = "caddy-01"
  vm_id          = 112
  image_id       = local.image_id
  cores          = 2
  memory         = 2048
  disk_size      = 20
  ip_octet       = 200
  tags           = ["bootc"]
}
With this setup I can easily create new VMs by adding a new module block. This approach allows me to know that my entire lab is created with a predictable baseline. All these tools together make up the BAT stack.
Conclusion

The BAT stack and how it all works together to manage my homelab
Getting all of this working together was satisfying, and cuts down a lot of the manual work I used to do when maintaining my homelab. With this stack I am less afraid to experiment and break things because I can revert to a previous state as everything is version controlled in git.
To test my setup, I wiped my entire lab including my home network. It took 5 minutes to get everything up and running again. This is a huge improvement compared to the hours it used to take when I had to manually configure everything.
My CI/CD pipeline already handles building and pushing bootc image updates to the registry. The next step is to have pipelines handling deploying the playbooks and OpenTofu modules to my lab so that whatever is in git is what is running in my lab. Check out my GitHub repository to see how I have everything setup.
View on GitHub